Showing posts with label how to. Show all posts

Tuesday, March 29, 2011

Delicious Bruleed Grapefruit

My brother suggested this, and we tried it out (a few times) while in arizona. They were so, so good!

1. We started with fresh picked ruby grapefruit, and loosened the wedges by cutting around the membrane with a sharp paring knife.


2. We found that dabbing the top of the grapefruit with a clean cloth or paper towel helped, otherwise the sugar was too juicy and it wouldn't caramelize properly.  Then add the brown sugar in an even layer across the fruit. We ended up with a hard candy top on one of our early attempts, which was certainly delicious--but not exactly what we were looking for. 

 3. Torch it--the sugar takes less than a minute to caramelize.

4. Enjoy!

Sunday, January 2, 2011

Dinner


mmm. . . piping hot roasted vegetables from the oven: onions, beets, potatoes and carrots with tarragon vinegar, italian herbs, olive oil, and sea salt.  For some reason, I've always chopped the vegetables and put them directly in the baking dish, but now I've realized that they work better if you toss them with the olive oil/herbs in a bowl first. . . duh.  I also cooked them covered in foil, but uncovered and broiled them for the last 10 minutes.

I made the tarragon vinegar earlier in the summer when a friend gave me more tarragon than I could use. It was so, so easy but this was the first time I've used it. I was a little bit nervous, since I'm not always fond of tarragon's anise flavor, but the vinegar is delightfully mild on the anise, but deliciously tarragon.

Tuesday, October 5, 2010

Home Made Furniture

We needed a low, narrow shelf to fit our overflow of books.  They were literally stacked on every surface, including the couch and the kitchen table.  We had been looking at some furniture stores, and through the ikea catalog, but there wasn't anything that fit the space perfectly (or really at all).  So we decided to make our own.  We went to Home Depot and bought boards and had them cut to size.  We sanded and stained them to match our other bookshelf, and used corner brackets to attach the legs.

The design of the shelf was pretty easy; we measured our largest book and decided the height of the shelves accordingly.  The length was dictated by the length of the boards at the hardware store, and they just happened to fit perfectly.  There are four legs, one on each corner, and two supports in the middle (made up of six pieces, each bracketed to the shelf on the top and/or the bottom).  We were worried that we would miss a measurement somewhere and it wouldn't fit together, but it was surprisingly easy to construct.   The middle supports basically dictated the height of the shelves, and we intentionally left the corner legs a little long to accommodate for any discrepancy in the measurements.


.
And look at our new shelf!  I was afraid that the room would be too full, but it works nicely; keeping the top shelf pared down keeps the room from looking cluttered.  

Monday, July 5, 2010

Hot Days

It's been hot here.  And right now we're gearing up for a week of near 100° daytime highs.  This is not exactly my idea of nice weather.

Luckily, there are things that you can do on hot days to make them slightly more bearable: like make smoothies.  Right now, however, peaches are the perfectly delicious (and perfectly ripe!) fruit at the stores, so we buy and freeze (literally) pounds of them and they work just as well (if not better in some respects) than the cherries for a breakfast yogurt smoothie.  But you can't drink smoothies all the time, so we're mixing it up a little with one of my other favorite daytime drinks:


Squeeze half a lime over ice
Fill half the glass with seltzer
Top it off with Looza (or Goya or any brand) peach nectar
Throw in some peach and lime wedges for garnish (and added flavor)

Delicious!

Thursday, July 1, 2010

Fabric Scrap Postcards

I need to cut down on my fabric scrap pile.  So I made a slew of post cards with some of it: I cut the fabric to size, glued it onto chipboard, had lettered 'post card' and drew some lines on the back.  voila!   


I like that the edges are still raw and slightly rough cut.  I started drawing the lines with a ruler, but preferred the look of hand drawn lines.  I'm very excited to send them to people!

Thursday, June 17, 2010

Treasure Chest

I found this suitcase in the shed at my brother's house.  It was full of old papers: letters, forms, notes, pamphlets and all kinds of ephemera from years ago.  Some were things like "Financial Planning During the Depression" or school notes, and there was a golf score card, too.  It was a lot of interesting old papers, some of which had been moth-eaten, but all were in remarkably good condition regarding their age.  I also love the stained fabric lining of the suitcase; I guess I have a thing for old, stained fabric.


I did nab this letter, addressed from my great grandfather's sister to my great grandfather.  It was sent in 1940.  I love that the envelope was also used as a notepad.  I think it looks nice in a frame, not that I have much wall space left. . . 


Wednesday, June 2, 2010

Cherry Season

It's been hot here, and everyone's been somewhat lethargic.  So our cool down trick has been fruit smoothies.  My favorites are cherry and apple: We'll pit the cherries or slice up the apples and freeze them.  After everything is frozen solid, into the blender they go with plain yogurt and some soymilk (or regular milk or --my favorite-- almond milk).  It is so delicious and one of my favorite quick breakfasts or anytime snack.

Sometimes we'll toss in a scoop of protein powder, but the secret to a delicious smoothie is:  cinnamon.  It makes everything more delicious without additional sweetener.  I also like to add a small spoonful vanilla, especially with the cherries.  mmmmm. . . cherry vanilla.


See? even Melvin says it's too hot.

Wednesday, May 19, 2010

Fabric Burning


Sometimes I'll get a scrap of fabric without knowing it's content.  It's not always very easy to tell the difference between a real silk satin and a polyester satin by touch alone, so I'll test burn fabric to determine the content, and surprisingly, it's not nearly as hard as it seems.  I snip a small piece of the fabric to be determined and burn it over a metal plate.  Depending on how easily it ignites, what the flame looks like, and how the charred ash looks and feels, you can determine the fiber.  It helps to first test a piece of fabric which has a known fiber content so that you'll have an idea of what you're looking for.  I also keep an inventory of fabrics I've already tested so that I can always have a test scrap on hand if I'm unsure of a piece's content.

Here's a basic guide, but the internet is full of information, if you want more.
-Polyester or acrylic fabrics will melt (much like plastic) and harden into a black, melted mess.
-Wool smells like burning hair and the burnt fibers become crispy. It's also a bit harder to light than cotton.
-Cotton smells much like burning paper, lights and burns easily, and the fibers will become a fine powder when rubbed between fingers.
-Silk smells much like wool, but the burnt fibers are slightly less crispy and they don't ball up as easily as wool.  The fabric seems to char and then burn, so it leaves a larger charred section on the scrap. I don't know if this is because of the way it's woven, or if it has to do with the content, but that's been my experience.

Wednesday, May 5, 2010

It's so Hot

The past few days have been very warm.  I've been making small batches of iced tea so that I have something cold to drink:


As you may know, I like jars,  and mason jars make nice large sized drinking glasses.  I've found that 4 teabags work well in this size.  Before I pour in the boiling water, I'll rinse it out with hot water from the sink to warm the glass; I let the teabags steep for 15 or 20 minutes (depending on the type of tea I am using).  I like the small batches because I can make multiple flavors.  On the left is rooibos, and on the right is green tea with blueberry.  

Wednesday, April 28, 2010

My Kitchen


It's not really a secret that I love jars.  When we moved, we got rid of everything and I had this grand idea to only use jars as drinking glasses.  I would (and still do occasionally) buy items at the store because I liked the jar it came in.  Of course, some just won't work as a drinking glass but still can be very useful, and I felt wasteful throwing them away--so I ended up with a large surplus of glass bottles and jars that were accumulating at a fairly alarming rate.  Since then I've found a solution in using them as storage containers.  I had bought some plastic kitchen storage bins to keep things like rice and sugar, but I stopped using them because I like my solution better.  I'll use sharpie to label the contents and it washes right off when I reuse the jar for something else.


Monday, April 5, 2010

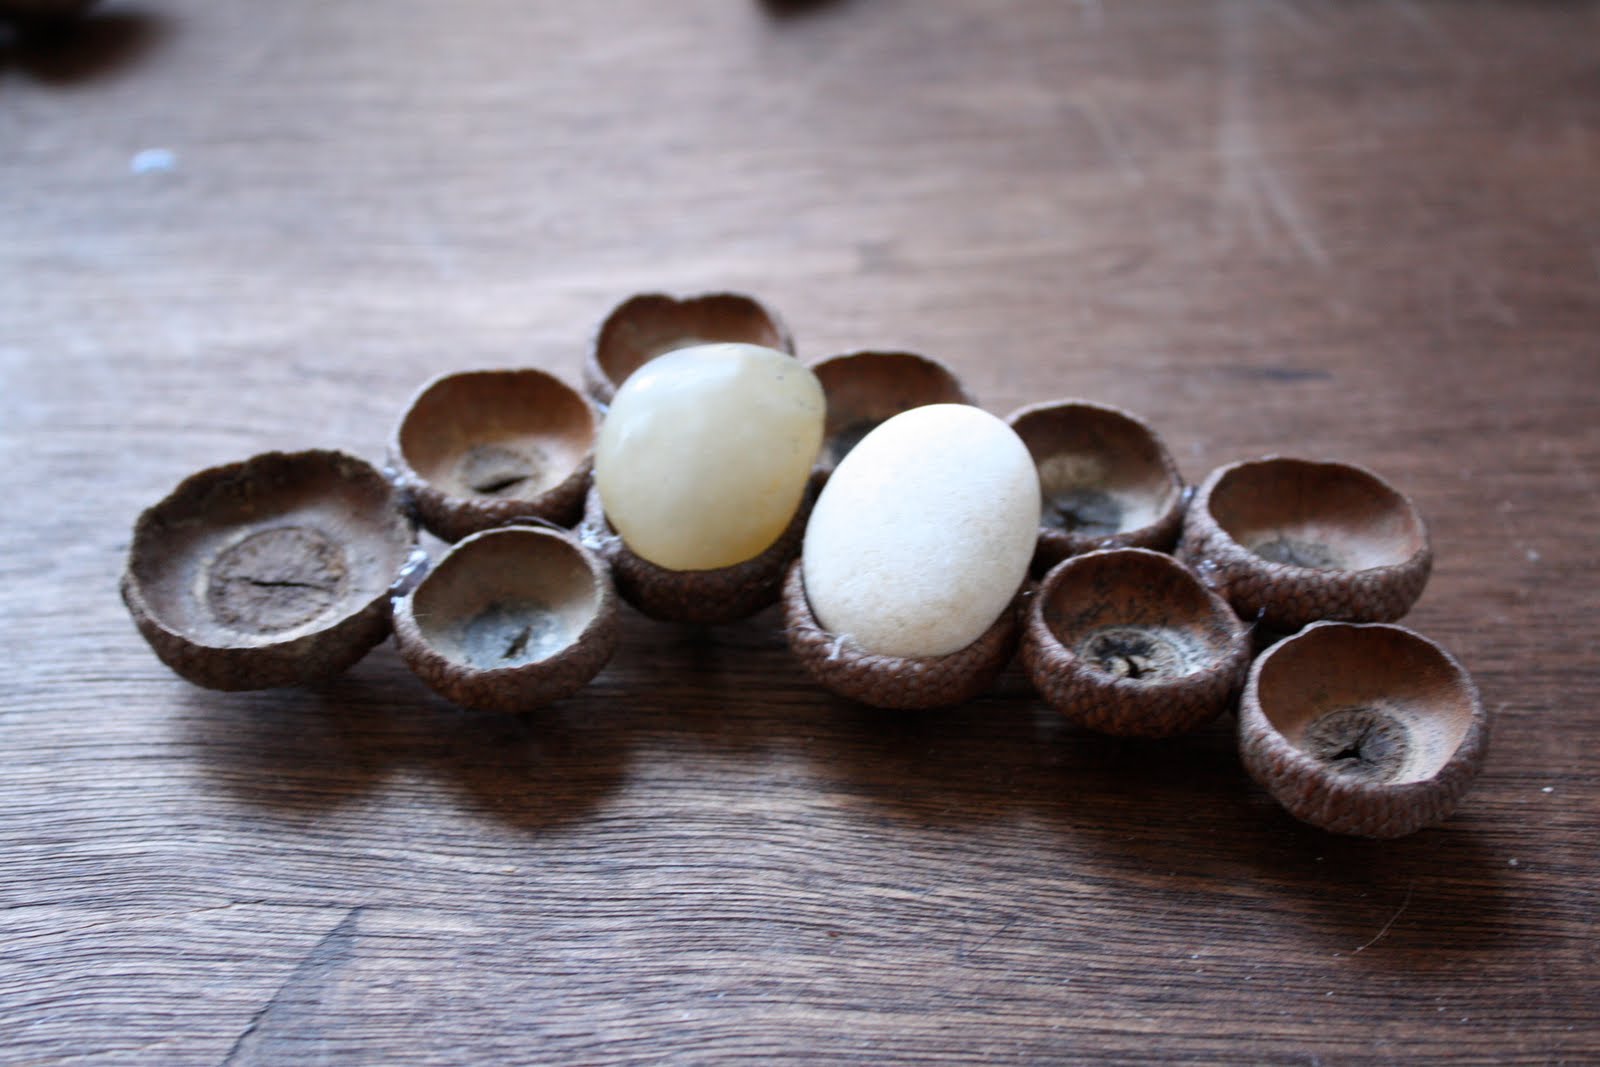
How To: Acorn Cap Cups

I though I'd share a discovery from this weekend.  In Delaware, I found a plethora of acorn caps on the ground, but none of them had any actual acorns.  A light bulb went off in my head because I've been thinking about egg cups lately:  How could I figure out a way to make these acorn caps into egg cups?  Below are the very simple steps:

The grocery store nearby sells quail eggs, which I've always been slightly too creeped out to buy, and of course when I finally decide that I want them, they are out.  So I used stones instead, which I think may have turned out better.

All you need are acorn caps and a glue gun.


I started by picking three caps that were roughly the same height.  Then I just glued them together in a triangle shape, and added more until I liked the final shape.


I eyeballed the placement of the glue by holding it in place before I gunned it.


Then, while the glue was still hot, I stuck them in place.  I learned that it's better to try to have your excess glue on the stem side of your caps so it doesn't show, but it's fairly easy to pick off if you mess one up.


See? Simple as pie.


I'm thinking of them more as spring decorations than easter decorations, so enjoy!